Lighting is one of the most crucial aspects in photography and photo editing. It can dramatically impact the mood, tone, and overall quality of an image. Lighting adjustments allow photographers and editors to manipulate light in the image to enhance visibility, bring out details, or create artistic effects. Whether you’re an amateur using your smartphone or a professional working with high-end software, understanding how to adjust lighting can transform your photos. In this article, we’ll explore the various techniques, tools, and tips for lighting adjustments in photo editing, along with practical insights on how to get the best results.
Before diving into lighting adjustments, it’s essential to understand the role of light in photography. Natural light, ambient light, and artificial lighting all affect an image differently. For example, natural sunlight can create warm and soft tones, while artificial lighting can produce harsh shadows or even color casts.
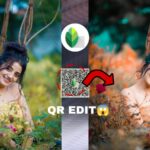
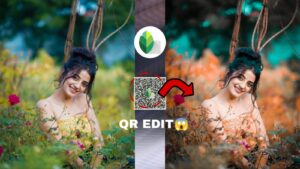
Download Now :-
When you edit a photo, the goal is to use these lighting characteristics to your advantage. In post-processing, you can enhance these elements to highlight your subject or modify the mood. Analyzing the source and quality of light helps determine which adjustments to apply.
Basic Lighting Adjustments: Brightness and Contrast
One of the simplest and most commonly used lighting adjustments is changing brightness and contrast. These settings are available in almost every photo editing app or software. Adjusting brightness increases or decreases the overall light intensity in an image, while contrast modifies the difference between the darkest and lightest areas. Increasing contrast can make the image pop by making colors more vivid, while reducing it creates a softer look. However, be cautious—overdoing it can cause your image to lose detail or appear unnatural.
Exposure Correction: Balancing Light and Dark
Exposure is another fundamental aspect of lighting adjustment. If a photo is too dark (underexposed) or too bright (overexposed), details can be lost. Exposure correction allows you to bring out hidden details by balancing the highlights and shadows. For example, increasing exposure can recover shadow details in dark areas, while decreasing it can tone down blown-out highlights. Most photo editing apps, such as Lightroom, Snapseed, or even Instagram’s built-in editor, offer an “Exposure” slider to fine-tune the light balance.
Highlight and Shadow Adjustments: Enhancing Details
Highlight and shadow adjustments focus on refining specific areas of an image. Highlights refer to the brightest parts of a photo, while shadows are the darkest regions. Adjusting these can bring out details that are otherwise hidden. For example, reducing highlights can help recover details in a bright sky, while lifting shadows can reveal textures in dark clothing. This type of fine-tuning can significantly impact the overall quality of an image, making it look more professional.
Midtones: The Key to Balanced Lighting
Many beginners overlook midtones, but they play a crucial role in lighting adjustments. Midtones are the intermediate brightness levels between shadows and highlights. Adjusting midtones helps to balance the lighting across the image, preventing it from looking too harsh or flat. Tools like “Tone Curve” in professional editing software offer precise control over midtones, allowing editors to create subtle yet powerful changes. A well-adjusted midtone range can add depth and dimension to an otherwise ordinary image.
White Balance and Color Temperature
Lighting adjustments aren’t just about brightness and contrast; they also involve color. White balance and color temperature settings control the color cast in an image. For example, an image taken in tungsten light may appear too yellow, while one shot in fluorescent light may have a blue tint. Correcting white balance ensures that the colors look natural. Most editors offer presets like “Daylight,” “Cloudy,” or “Tungsten” to adjust white balance, but manual adjustments allow for finer control.
Using the Tone Curve for Precise Adjustments
The Tone Curve is a powerful tool for lighting adjustments, especially in professional software like Adobe Lightroom or Photoshop. It allows for detailed control over different regions of an image, including shadows, midtones, and highlights. The Tone Curve works by plotting the brightness levels on a graph, and you can manipulate these points to change the light intensity in different parts of the image. For example, raising the curve in the highlight region will brighten only the brightest areas, while lowering it in the shadow region will deepen dark areas.
Histogram: Understanding Light Distribution
A histogram is a graphical representation of the light distribution in an image. It shows how much of the image falls into shadows, midtones, and highlights. Learning to read a histogram can greatly enhance your ability to make effective lighting adjustments. A balanced histogram means that there is a good range of light in the image, while a skewed histogram indicates overexposure or underexposure. Most professional photo editors display the histogram in real-time, helping you see the effects of your lighting adjustments.
Advanced Techniques: Dodging and Burning
Dodging and burning are advanced lighting techniques used to selectively lighten or darken areas of an image. These techniques, which originated in traditional darkroom photography, are now digitally replicated in software like Photoshop. Dodging makes specific areas lighter, while burning makes them darker. This technique is used to direct the viewer’s eye, add depth, or highlight particular features. For example, you might dodge the subject’s face to draw attention to it, while burning the background to create separation.
Using Filters for Creative Lighting Effects
Filters aren’t just for adding colors or effects; they can also modify the lighting in an image. Many apps, such as VSCO and Snapseed, offer filters that simulate different lighting conditions, like sunset glow, studio lighting, or even soft focus. Using these creatively can change the mood of an image without manual adjustments. For instance, applying a “Vintage” filter can add a soft, faded look with muted highlights and shadows, while a “Drama” filter can enhance contrast and give a high-clarity appearance.
Conclusion :-
Vignetting is a lighting adjustment that darkens or lightens the edges of an image. It’s often used to draw attention to the center of the photo and emphasize the subject. Light vignettes create a dreamy effect, while dark vignettes add drama. Many photo editors have built-in vignetting tools with sliders to control intensity and feathering.